
What is Motion Blur?
Motion blur is a critical aspect of video editing that can enhance the visual quality and realism of your footage. It replicates the natural blurring effect our eyes perceive when objects move, providing a sense of speed and fluidity.
Adding Motion Blur in DaVinci Resolve
Knowing how to add motion blur in DaVinci Resolve can elevate your editing skills and final result. There are two main ways to accomplish this task:
- The first uses Optical Flow and Vector Motion, and can be accomplished with the free version.
- The second method is a little more complex and can only be completed with a paid-for version of DaVinci, but provides better results as it uses Motion Blur Ramping.
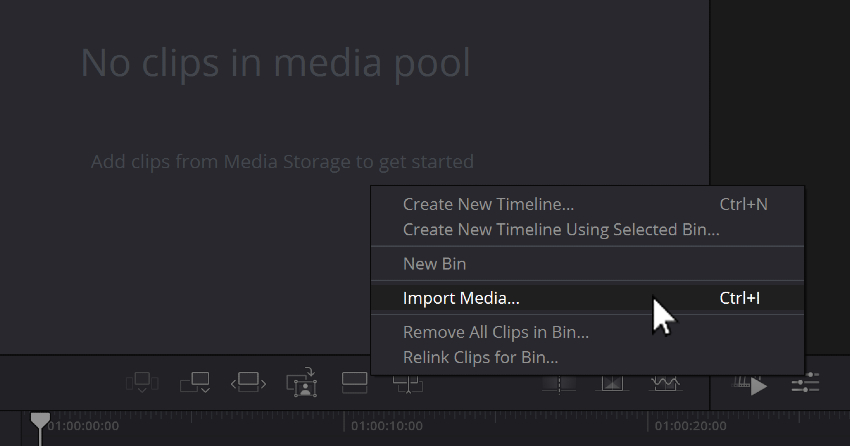
Both methods start with the same step: importing your video clip and dragging it into your timeline. To do this, open your clip in DaVinci Resolve by ‘right-clicking‘ in the media pool area, and choosing ‘Import Media…”. Then, drag the imported media to your timeline.
Method 1: Using Optical Flow and Vector Motion Blur
The method involves using two features in DaVinci Resolve: Optical Flow and Vector Motion Blur.
This method applies to any video type you may want to use. If you’re looking for diverse footage to practice on, consider checking out Envato Elements and Mixkit. These platforms offer a vast library of stock videos that can be easily integrated into your projects.
For this tutorial, we’ll use a clip of a video we created for another article (How to Create AI Music Videos With AI Art Generator Kaiber). Here’s a step-by-step guide:
Step 1
Navigate to the “Fusion” tab at the bottom of the screen.
User clicking on ‘Fusion’ tab to create motion blur in DaVinci Resolve.
Step 2
Press ‘Shift and Space‘ simultaneously to bring up the search menu.
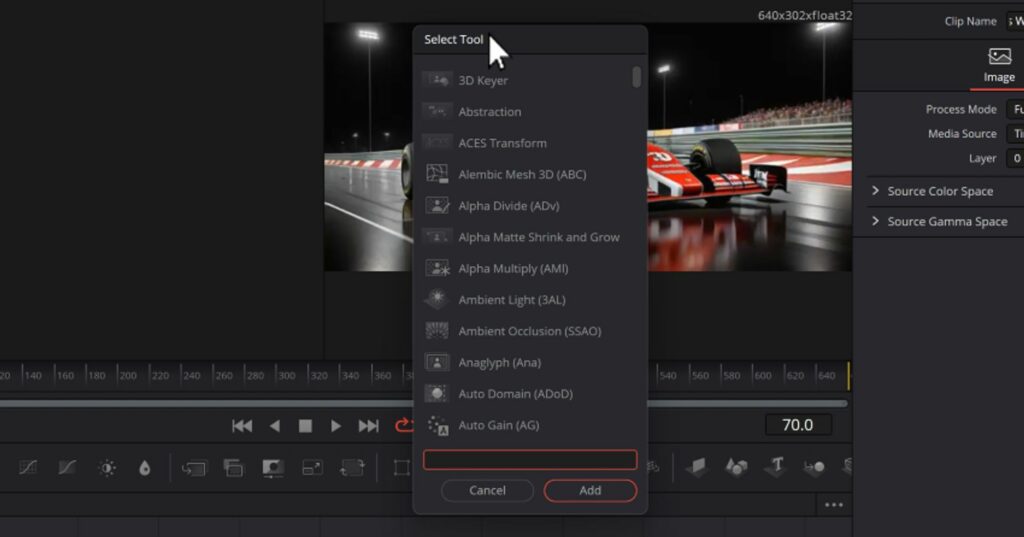
User pressing ‘Shift + Space Bar’ to bring up ‘Select Tool’ Menu for how to add motion blur in DaVinci Resolve.
Step 3
Type “Optical Flow” into the search bar, select it, then click ‘Add‘ button. Optical Flow smoothens your video, enhancing the overall visual quality.
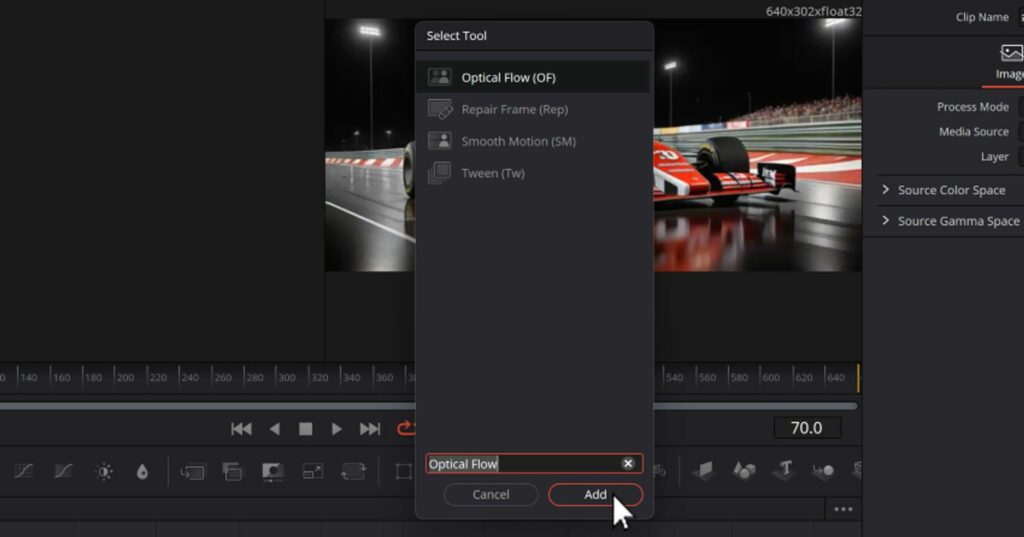
User Typing “Optical Flow” into the search bar Select Tool Menu in this article for how to add blur in DaVinci Resolve.
Step 4
Without adjusting the Optic Flow settings, press ‘Shift and Space‘ to bring up the search menu again.
Step 5
This time, type “Motion Blur” into the search bar. Select “Vector Motion Blur“. This feature is generally the best for adding motion blur. Click “Vector Motion Blur“, and then click ‘Add‘ button.
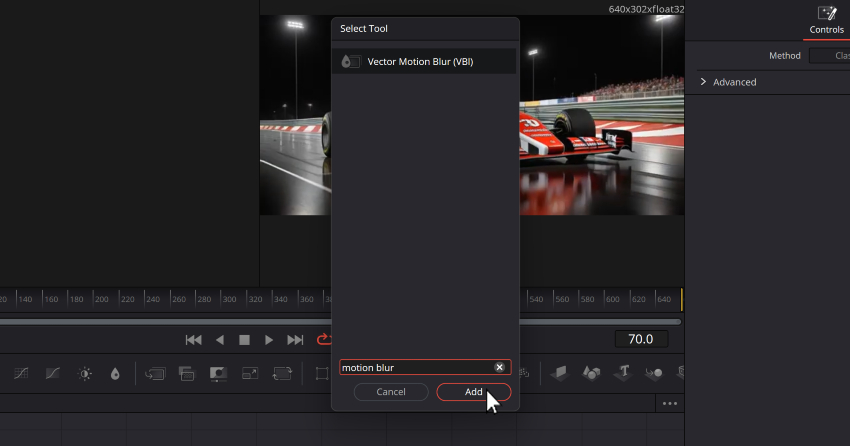
User clicking ‘add’ button to add ‘vector motion blur’ to video to add motion blur using resolve
Step 6
Once you’ve added Vector Motion Blur, you can adjust the intensity by adjusting the ‘scale’ slider. For instance, setting it to 10 will create an extremely blurred effect. In contrast, setting it to 0 will make the motion blur non-existent. For subtle and clean motion blur, a setting of around 0.33 should work pretty well. In my case, the video I’m working with looks better with more.
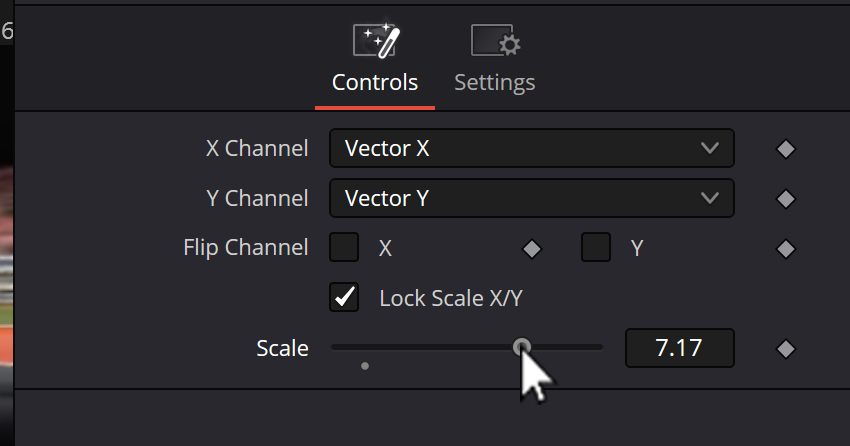
User adjusting intensity by adjusting the ‘scale’ slider to demonstrate how to add motion blur in DaVinci Resolve.
Method 2: Using Motion Blur Ramping in DaVinci Resolve
The motion blur ramping method allows for a little more focused motion blur giving your effect a deeper and more realistic feel, as opposed to the first method which is a little more broadly applied. It has a few more steps involved but can be really impactful, especially when adding sounds to go along with it.
Here’s a step-by-step guide:
Step 1
“Right Click” on your clip and chose ‘Retime Controls’. You can also press ‘Ctrl+R‘
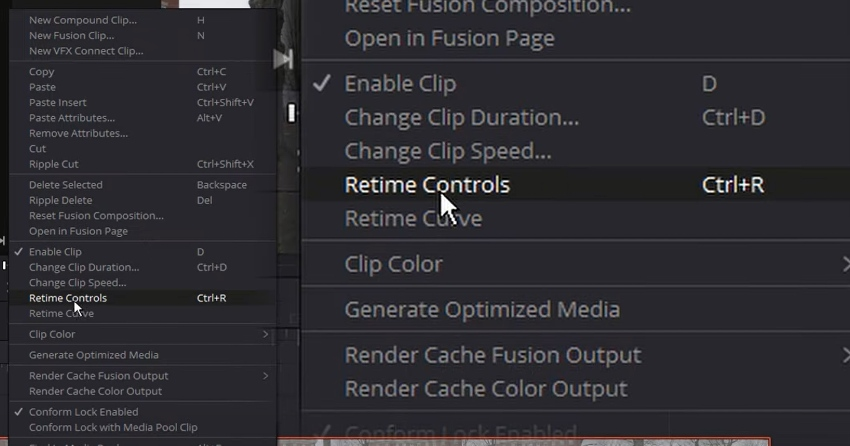
User clicking on ‘Retime’ Controls after right clicking on clip for how to add motion blur in DaVinci Resolve.
Step 2
Use your pointer to drag the timeline marker to the point where you want the motion blur to start.
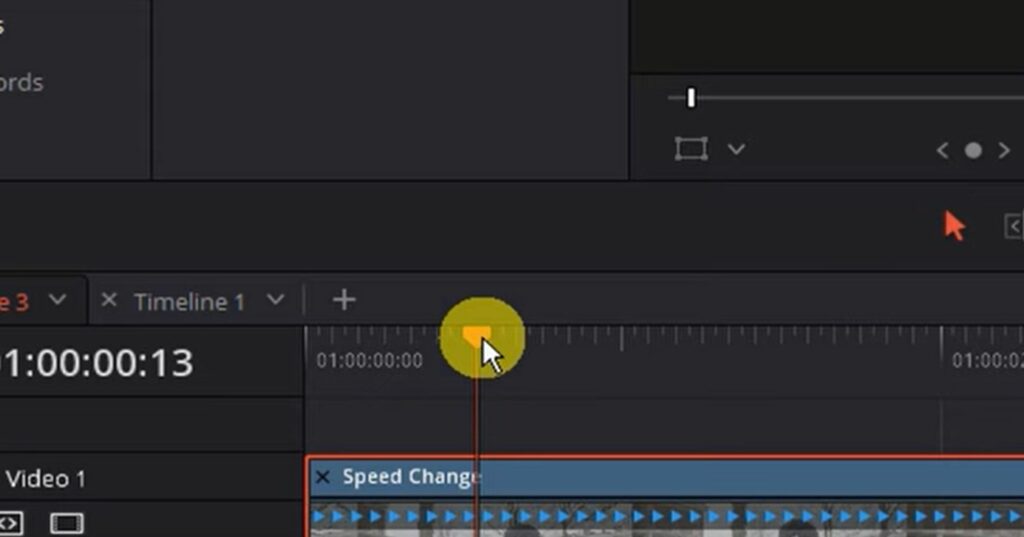
User choosing the starting point for the motion blur, in resolve, to start.
Step 3
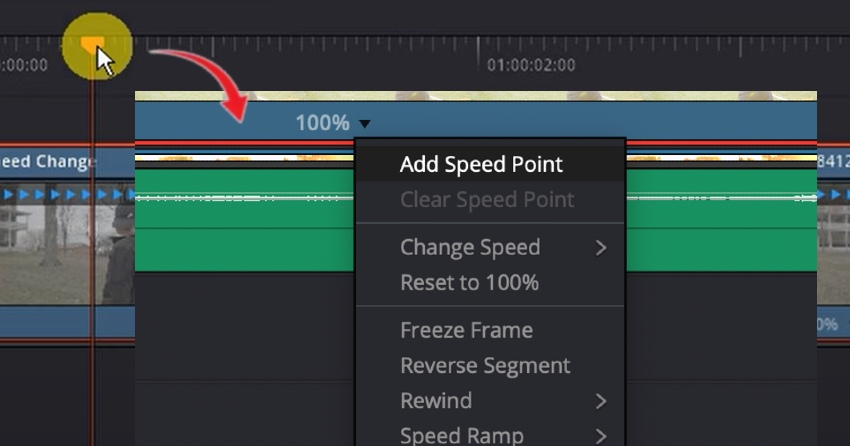
Click on drop down arrow on your clip, and choose ‘add speed Point‘.

User clicking down arrow and choosing ‘Add Speed Point’ to create motion blur in DaVinci Resolve.
Step 4
Repeat steps 1 and 2, for the end of the effect. Find the point where you want the blur to END, and add a speed point there too.
User creating end point for blur effect in DaVinci Resolve.
Now you have your start and end point picked out on your timeline.
Step 5
Click, hold the small red arrow above your preselected end point you selected in your earlier step, and drag it towards your starting point. This will increase the overall speed of that particular section. You’ll want to speed it up to about 450%, depending on the look you’re going for.
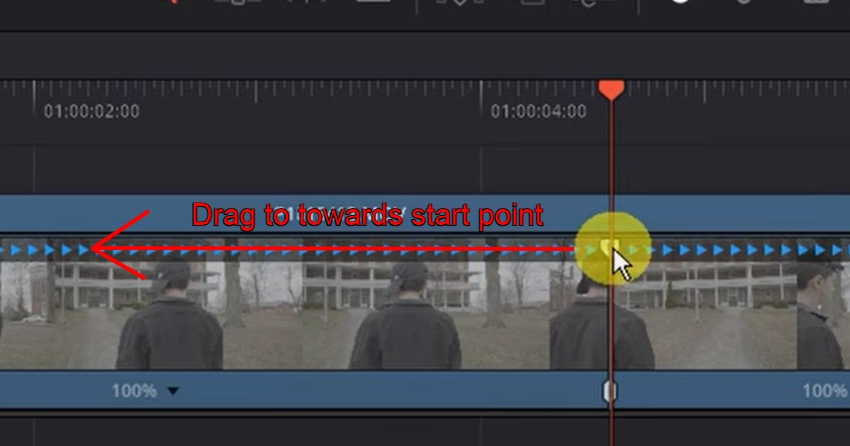
User grabbing small arrow at preselected end point, and dragging to the left towards starting point.
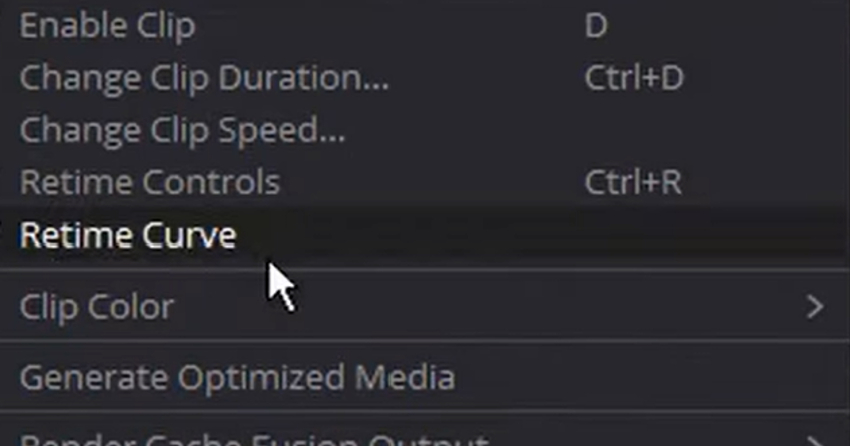
Step 6
Right click on clip and choose ‘Retime Curve‘.
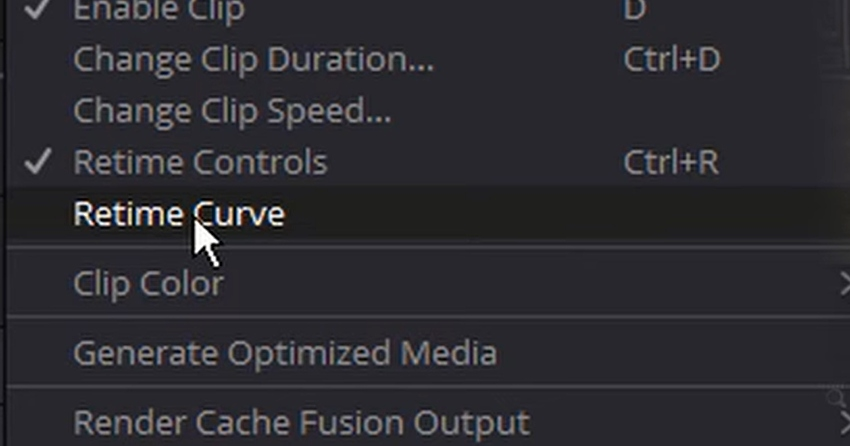
User clicking on retime curve DaVinci Resolve motion blur.
This will cause the keyframe viewer to popup at the bottom. You may need to reposition it a bit to look like this.
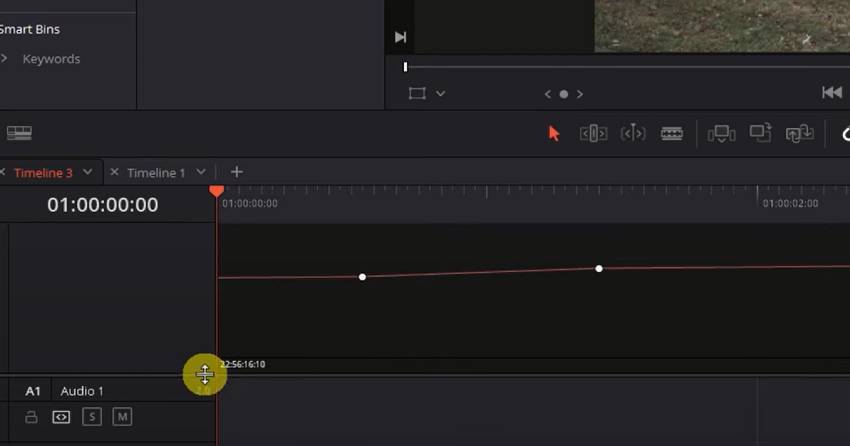
User adjusting keyframe viewer showing you how to add motion blur in DaVinci Resolve.
Step 7
Click the ‘Drop Down‘ arrow, and turn off ‘Retime Frame‘ by unchecking the box. Then check the box next to ‘Retime Speed‘ to turn it on.
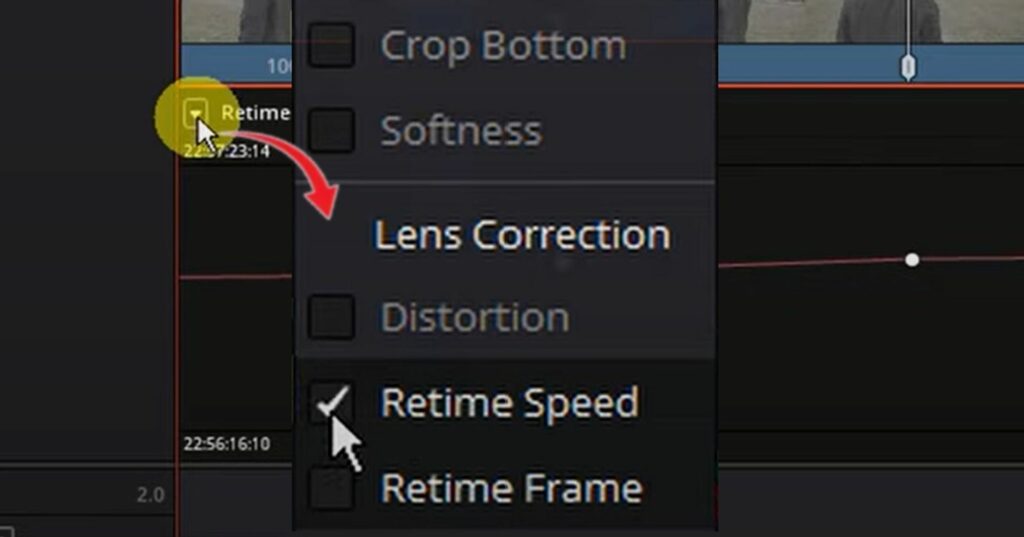
User disabling retime frame option and turning on retime speed in to make motion blur in DaVinci Resolve.
Step 8
Now the effect changes are applied we need to smooth everything out a bit to make it ramp up verses step up. To do this, click on the left ‘key-frame’, then click the ‘smooth’ button. Then repeat the process for the other one.
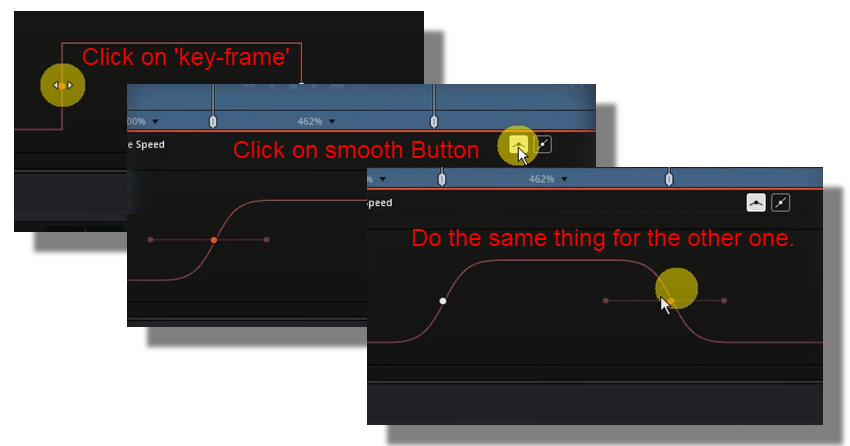
User adjusting keyframes by smoothing them out.
Step 9
Now use the ‘handles‘ to adjust the curves of the keyframes. You can really smooth the curves to get a nice speed ramp.
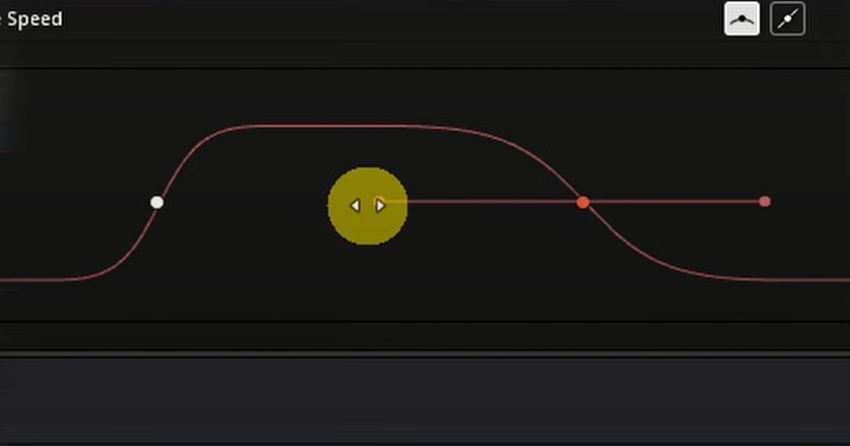
User using ‘handles’ to adjust curves of keyframes for how to add motion blur in DaVinci Resolve.
Once you get done perfecting the smoothness of your curves, you can go ahead and turn OFF your ‘retime curve‘ by using your ‘Right Click‘ menu on your clip.
User turning off retime curve in context menu.
Step 10
Click on ‘Effects Library‘, then click on small square left sidebar, at the top left hand corner. This will show you all the different categories you have to choose from. Click on ‘OpenFX’, then click on, hold, and drag ‘Directional Blur‘ down to to your clip.
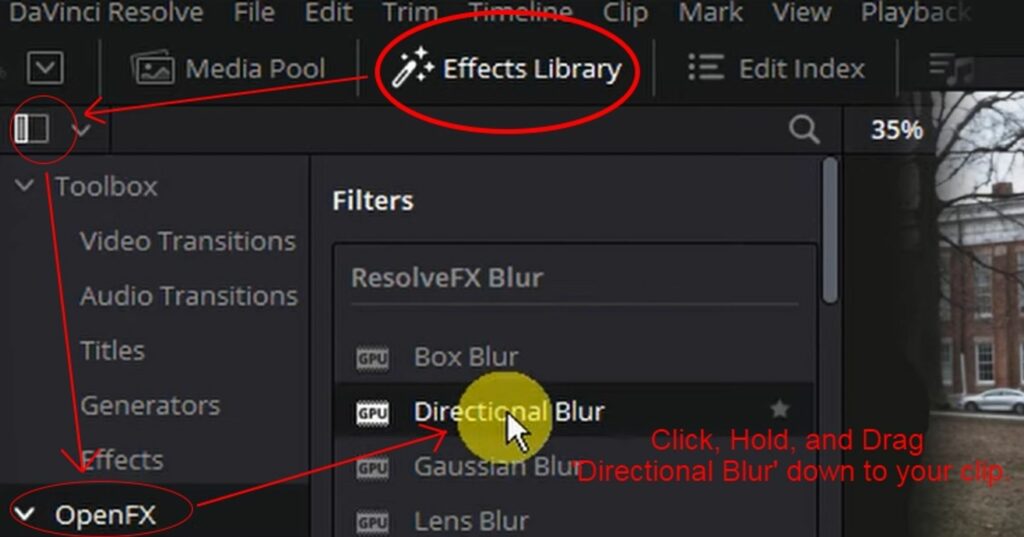
User accessing Directional Blur.
Step 11
Click on ‘Inspector‘, then click on ‘OpenFX‘. This is where we’ll decide which way we want our blur direction to move. The easiest way to test to make sure your direction is correct is to turn your blur strength all the way up. Don’t worry, we’ll turn it back down, but we just want to do this to check to make sure the motion direction is correct.
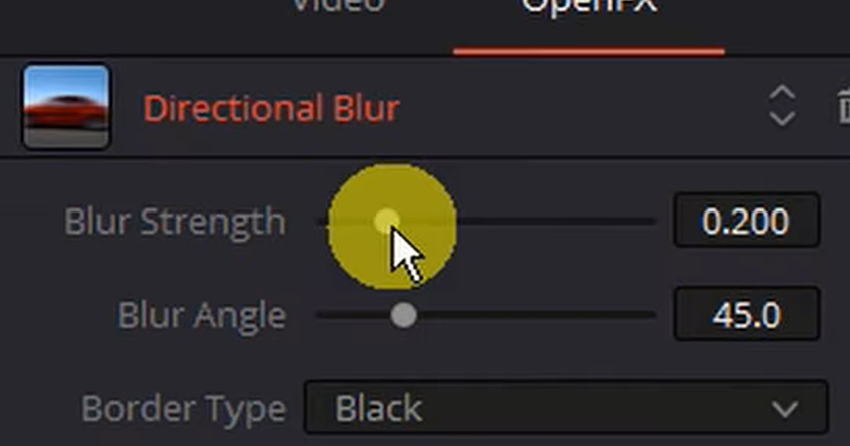
User turning up blur strength to test blur direction.
Step 12
Use the ‘Blur Angle‘ slider to adjust the blur angle.
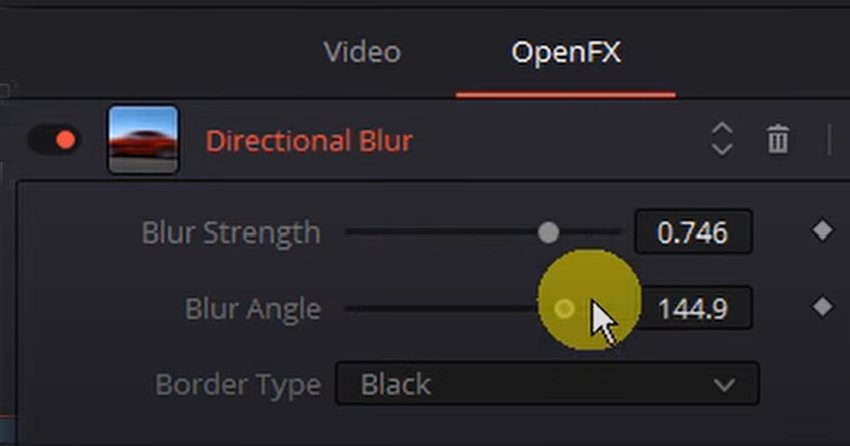
User adjusting blur angle with blur angle slider.
Step 13
Often times in editing you’ll want to get rid of the black border, to do this, use the ‘Border Type‘ drop down menu and choose ‘Replicate‘.
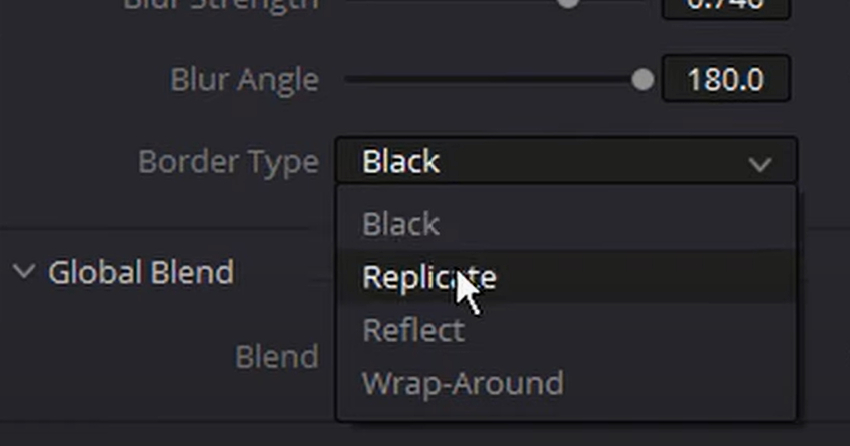
User switching border type to replicate.
Step 14
Once you’ve got everything looking good, now you can adjust your blur strength down to zero, then refer to your timeline and after placing your playhead on your first speedpoint move back four frames using your ‘Left Arrow‘.
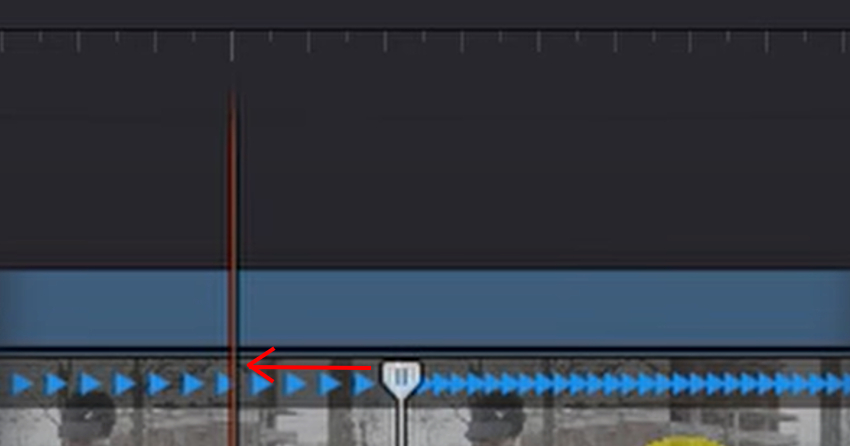
After placing playhead on first point, press left arrow 4 times to move it to the left.
Step 15
Add your first keyframe under ‘blur strength’ by clicking the diamond button in the ‘OpenFX‘ tab. Make sure the blur strength is set to zero for the first keyframe.
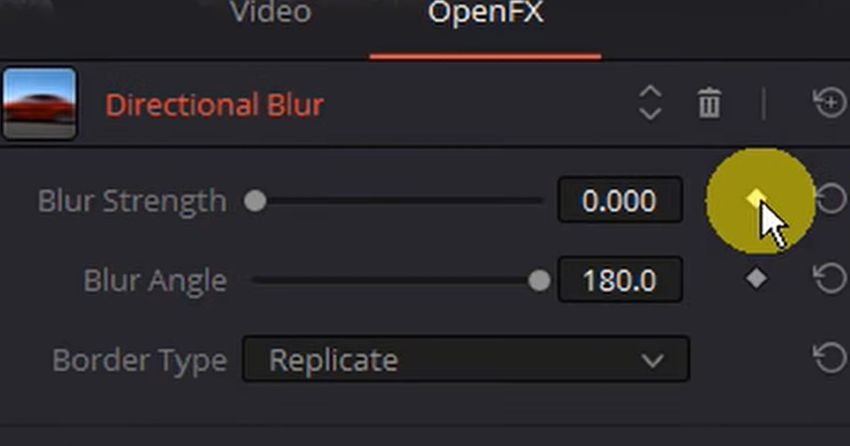
User Adjusting first keyframe in OpenFX Tab.
Step 16
Now drag your point of focus in your timeline to the point where you want the blur to peak by dragging it to the right.
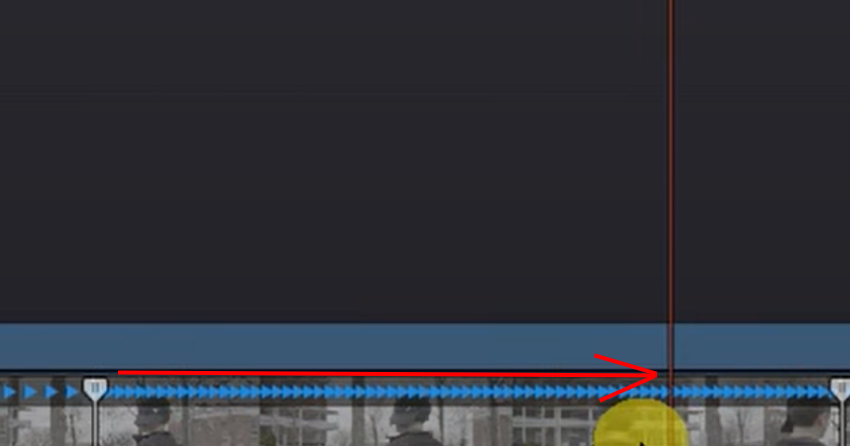
User moving focus to the peak of the blur.
Step 17
Raise blur up drastically to like around 700% (.700). By doing this, the system will automatically add a keyframe.
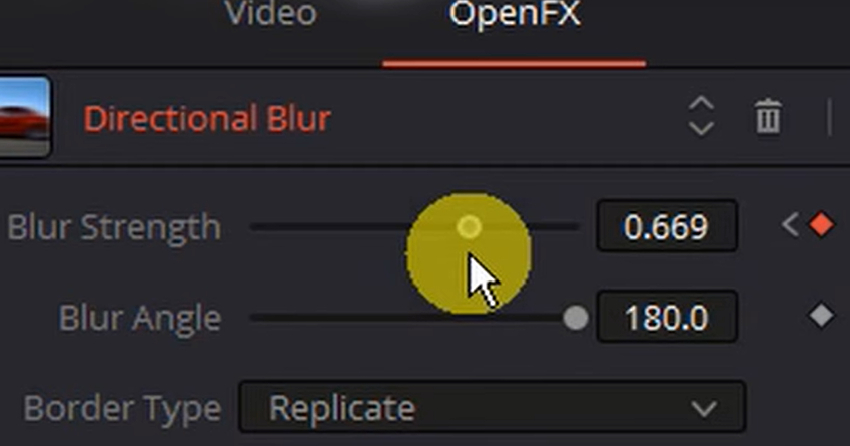
User raising blur to 700%
Step 18
Now put your playhead on your last speedpoint. Use your ‘right arrow‘ to move over to the right 4 to 5 frames in a similar fashion as you did earlier with the first speedpoint. Then bring your blur strength back down to zero. There you go! You’ve successfully created a focused motion blur!
Additional Tips and Tricks
Experimenting with the intensity of the motion blur can yield different results. Don’t be afraid to adjust the settings to suit your specific needs. But remember: the goal is to enhance your video, not distract from it. Therefore, subtlety is often key when it comes to motion blur.
As you continue to experiment and level up your editing game, consider subscribing to Envato Elements to get premium digital assets for your projects. It could be the tool you need to transform your videos from good to great!
Let’s Add Motion Blur in DaVinci Resolve!
Using motion blur in DaVinci Resolve, you can make your videos pop. The simple, yet effective steps covered in this article will take your videos to the next level. Don’t forget to stay tuned for more amazing content and tutorials on the Mixkit blog!


